For anyone who uses a Health Savings Account (HSA) knows you need a good system to track your expenses and receipts in the event of an IRS audit. If they ever find that you spend your HSA funds on non-eligible items or reimbursements, you could be hit with a 20% fee for the transaction; which is not a good way to spend your funds.
I want to share my method on how I keep track of my HSA using Quicken to track transactions and receipts. If you don’t have an HSA but are covered by a High Deductible Health Plan (HDHP), you should sign up for an HSA at any supporting bank; you can save on taxes! but more on that for another post.
Reimbursement Method
The first thing I suggest doing when working with your HSA is determining how you will be spending or reimbursing the funds from the account. Most banks offer a debit card for the account where you can spend the funds right away versus having to request for reimbursement after you’ve purchased the items. The benefit of this is that you’re not spending from your monthly budget and it’s an instant “reimbursement”. However, you can only use this on HSA eligible items and may need to reimburse your account if you purchase anything else at the same time that is not eligible for reimbursement. HSA’s offer a “Return of Mistaken Distribution” form that you need to submit with the funds so they’re not confused with a normal contribution. It is important to do this so you do not get hit with the 20% fee on those items.
The other method is to delay the reimbursement. The rules of an HSA state that you may reimburse yourself at any time as long as the purchase was made after the opening of the HSA Account. This means you can open your account, make an eligible purchase, and reimburse yourself 5 years down the road. However, you need to track your receipts for those 5 years for when you take the reimbursement. The upside of leaving money in the HSA is that it can grow, especially if invested, tax-free.
I choose to use my normal credit card and get the 1% back on my spending and later reimburse myself for the eligible amount. I can purchase everything, eligible and non-eligible, in one purchase removing any chance for mistaken disbursements. A big reason people pick one over the other is the record-keeping that comes with an HSA; both require it, but a later reimbursement requires a more meticulous system.
Introduction to Quicken
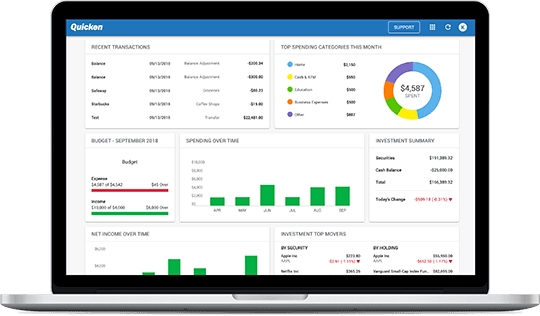
I will not get too deep into Quicken, but for those that may have not used the tool, I want to cover the basics of this topic. Quicken is a great tool for tracking transactions, bills, and account balances. The tool allows you to categorize transactions, apply any amount of tags to it, and even split the transaction up to apply their own categories and tags to each part. Based on the time, account, categories, or even tags you can have Quicken pull reports on your transactions for a quick analysis.
To pull up reports, go to Spending -> Bank Reports -> Transactions.
As we go through our method for keeping track of HSA transactions, it relies on being able to pull a report on the transactions. After completing a purchase with an eligible expense, here are the 4 steps I follow for managing my transactions in Quicken.
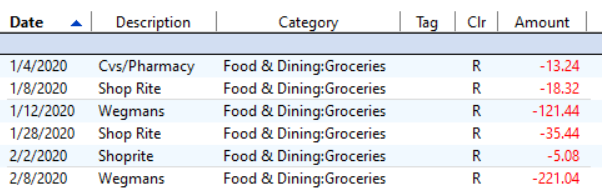
Step 1: Categorize HSA Transactions
We recommend using the real categories of the transaction here. Quicken comes with the default categories such as Doctor, Dentist, Eye Care, Pharmacy, etc. Running transactions reports allows you to see where your money is being spent and categorizing them allows you to filter down to specifics. We don’t do anything special with categories for tracking HSA expenses.
Step 2: Tag HSA Transactions
Using tags is the main method I use for filtering transactions that are eligible for reimbursement. For any transaction that is eligible, I will tag with HSA Eligible. If I purchase multiple items on a single receipt, I will split the transaction appropriately or at a minimum split such that the HSA eligible items are defined, categorized, and tagged.

Step 3: Attach Receipts
A neat feature with Quicken is that you can attach files to transactions such as PDFs, images, or word documents. You can add a file from your machine or “add from scanner” where Quicken will connect to your scanning software to scan and attach. I’ve found that scanning right off a scanner doesn’t provide as good of quality so I recommend scanning the receipt first, then attach it to the transaction in Quicken. Either way, attaching receipts is a great way to keep track of them for audit purposes. The one problem with this method is that the Quicken file will grow quicker as it expands with the size of the file. You can choose to keep them, store them somewhere else, or I solve it with my next step.
Step 4: Claiming Reimbursements
As we focus more on the benefits of tax-free investment growth that comes with having an HSA, we reimburse ourselves when we need the money in the budget for whatever month. This could be a couple of months later or a year or more later. We even have been considering saving our reimbursements to cover expenses for when we have our first child. In the meantime, the money has been invested and is growing tax-free. This is why tracking transactions and receipts are so crucial since we lump reimbursements together at a much later time.
The times I determined I wanted the reimbursement, I would figure a rough number I wanted and pull a report on all the HSA Eligible transactions. I would then pick individual ones that sum up to how much I wanted to withdraw. Originally, when I would reimburse myself, I would then tag them HSA Reimbursed so I would know. However, my latest method is to export the files to a single folder (named based on the date I am requesting the reimbursement, such as “CJ HE Savings 9-13-2019”) grouping them for that one reimbursement. This shrinks the Quicken file, which is nice while maintaining a system to track receipts with disbursements. I would then remove the HSA Eligible tag as I’m done with that transaction. All the while, I started a text file keeping track of the Date, Payee, and the amount for each item I’m reimbursing. This file I would then attach to the HSA reimbursement transaction (transfer) for my records.
Thoughts?
There are many ways for tracking receipts and many programs out there. Please share your methods in the comments below that we all can improve the way we do things. I have included below the must-have products that I use in my method. Lastly, if you have questions about HSAs and want help with navigating yours, request a coaching session today!
Must-Have Products